
How to create a complex samples analysis plan for the NSCAW
datasets, using SPSS
Based on SPSS version 24
This document is intended to assist NSCAW data users with setting up a complex samples analysis (CSA)
plan. The CSA plan is dependent upon the waves of data being used in the analysis, therefore, it is likely
that you will need to create multiple CSA plans. Guidelines for the appropriate application of the NSCAW
weights are found in Chapter 8 of the Data File User’s Manual (DFUM) and in the Statistical Analysis
Manual. Both documents are included in the dataset package.
This document presents two ways to set-up your CSA plan. The first way will be by using the Analysis
Plan Wizard inside of SPSS. The second way will be by using syntax to build your CSA plan. Advanced
data users may skip to the end of the document to view the CSA Plan syntax. The syntax can be modified
for use with analyses involving other waves of data collection.
Launch SPSS and open your NSCAW analysis data file now. From the menu across the top of the SPSS
window, go to “Analyze” and slide down to “Complex Samples” and then select “Prepare for Analysis…”
Proceed to page 2 of these instructions.
1
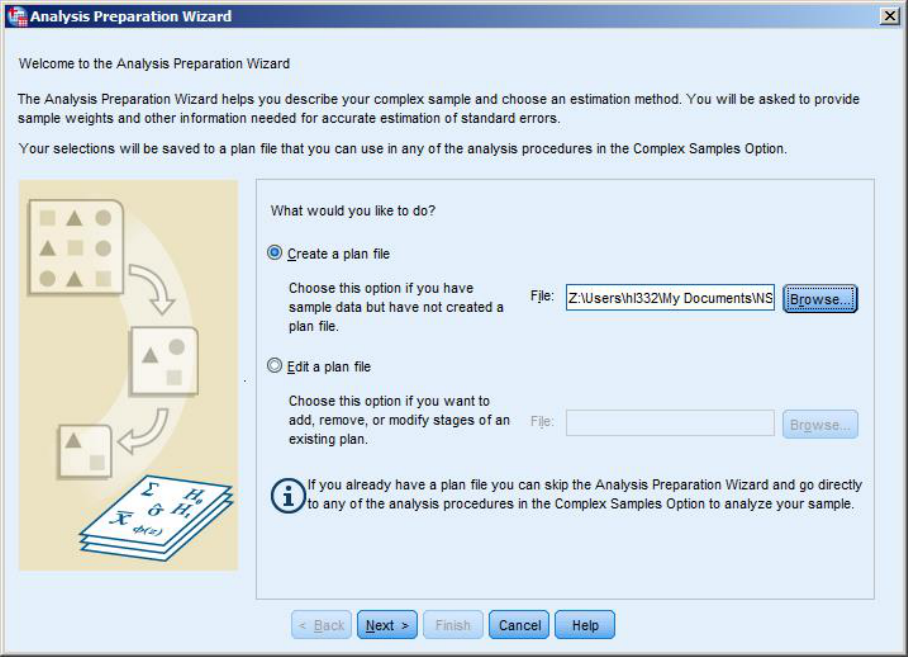
The “Welcome to the Analysis Preparation Wizard” window will open (See Figure 1). Click the
“Browse…” button to create a name for the analysis plan you are about to create.
Figure 1. A screenshot of the “Welcome to the Analysis Preparation Wizard” window
2
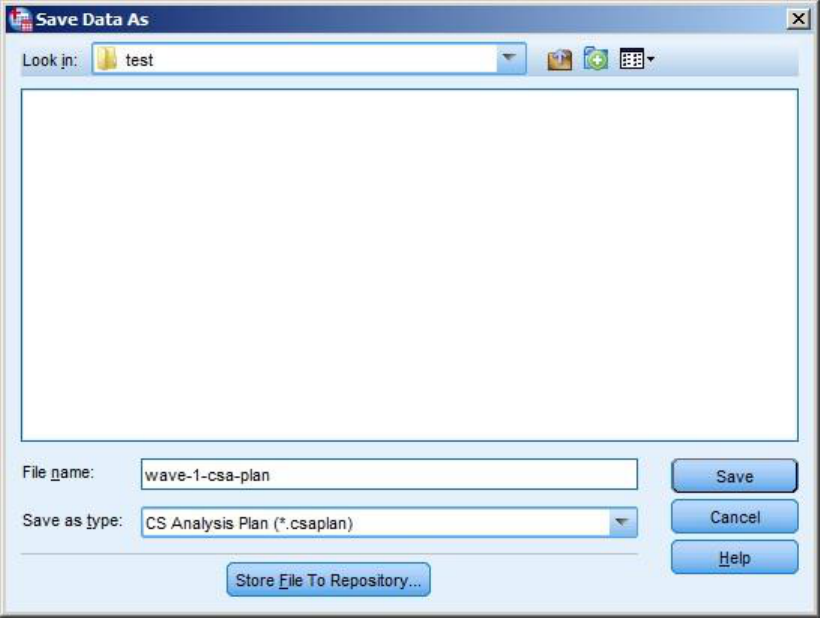
The next window that will appear is called “Save Data As.” This is when you will choose where you
would like to save the plan and under what name. We suggest naming your file based on the weight
variable used (i.e., NANALWT, NANALWT34, etc.). Once you are finished click the “Save” button located
near the bottom right side of the window (See Figure 2.)
Figure 2. A screenshot of the “Save Data As” window.
3
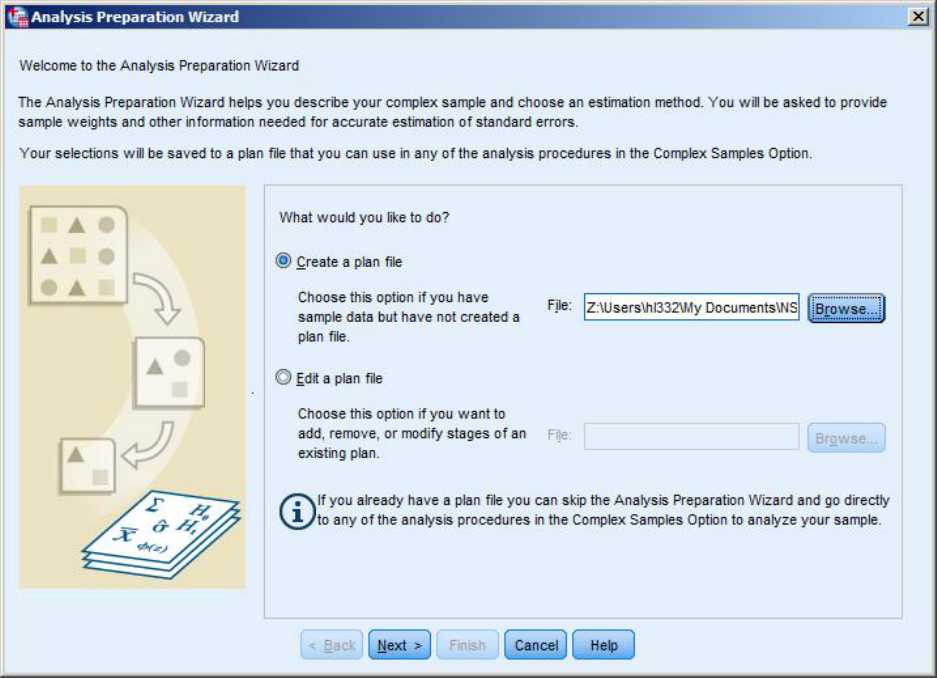
Once you return to the “Welcome to the Analysis Preparation Wizard” window, click the “Next” button
along the bottom of the window (see Figure 3.)
Figure 3. Screenshot of the “Welcome to the Analysis Preparation Wizard” window.
4
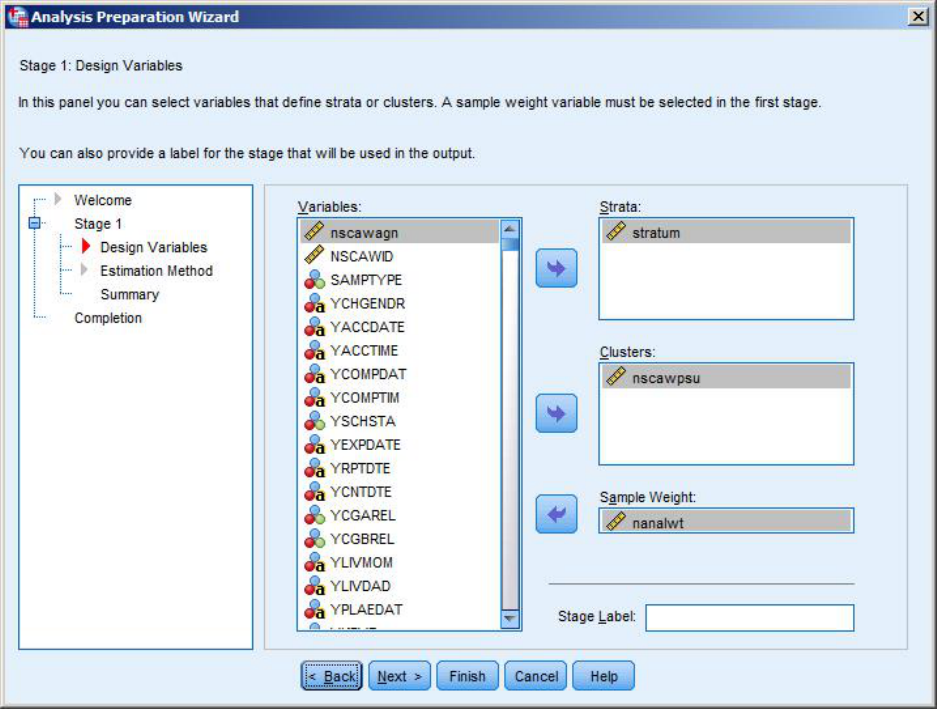
The next window to appear is called “Stage 1: Design Variables.” Make the following selections
described below and as shown in Figure 4:
Select and click the “STRATUM” variable from the Variables box into the Strata field using the arrow
button located between the two lists.
Select and click the “NSCAWPSU” variable from the Variables box into the Clusters field using the arrow
button located between the two lists
Select and click the appropriate weight variable. For a Wave 1 based analyses, it would be “NANALWT”
(National weight) or “SANALWT”(State weight—only available in NSCAW I and NOT in NSCAW II) variable
from the Variables box into the Sample Weight box. NSCAW I data users should consult the Data File
User’s Manual’s (DFUM) exhibit 8-9 titled “Guidelines for Choosing the Correct Analysis Weight for
Analyzing NSCAW Data” before selecting which weight variable to place into the “Sample Weight” field.
Click the “Next” button located along the bottom of the window.
Figure 4. Screenshot of the “Stage 1: Design Variables” window.
5
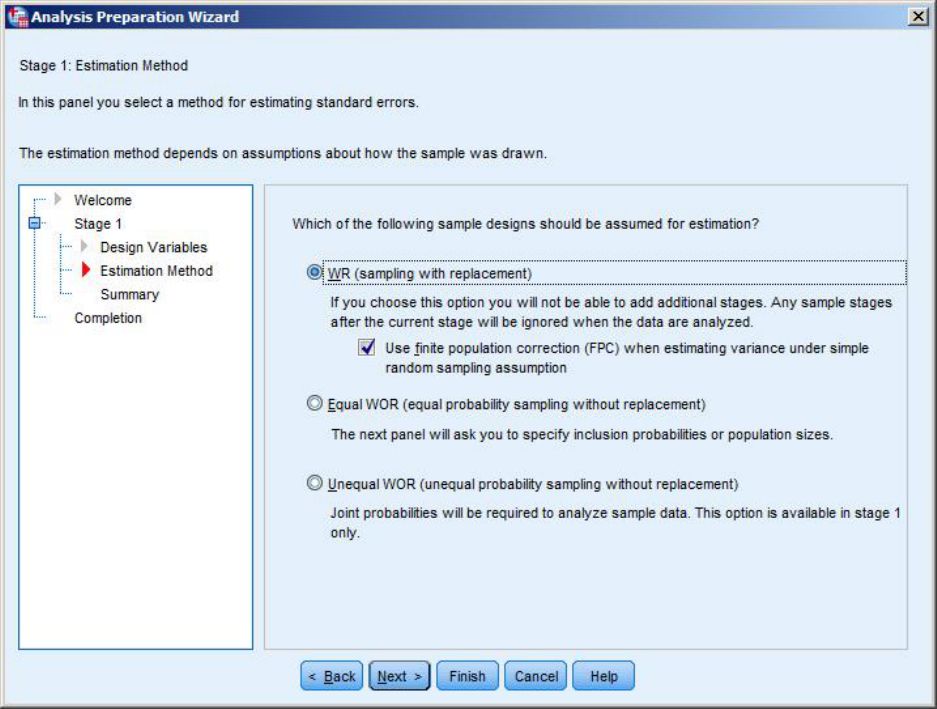
The next window to appear will be called “Stage 1: Estimation Method” (see Figure 5.). Leave the
default selection at “WR (sampling with replacement)” and “Use finite population correction (FPC) when
estimating variance under simple random sampling assumption” checked and then click the “Next”
button along the bottom of the window.
Figure 5. Screenshot of the “Stage 1: Estimation Method” window.
6
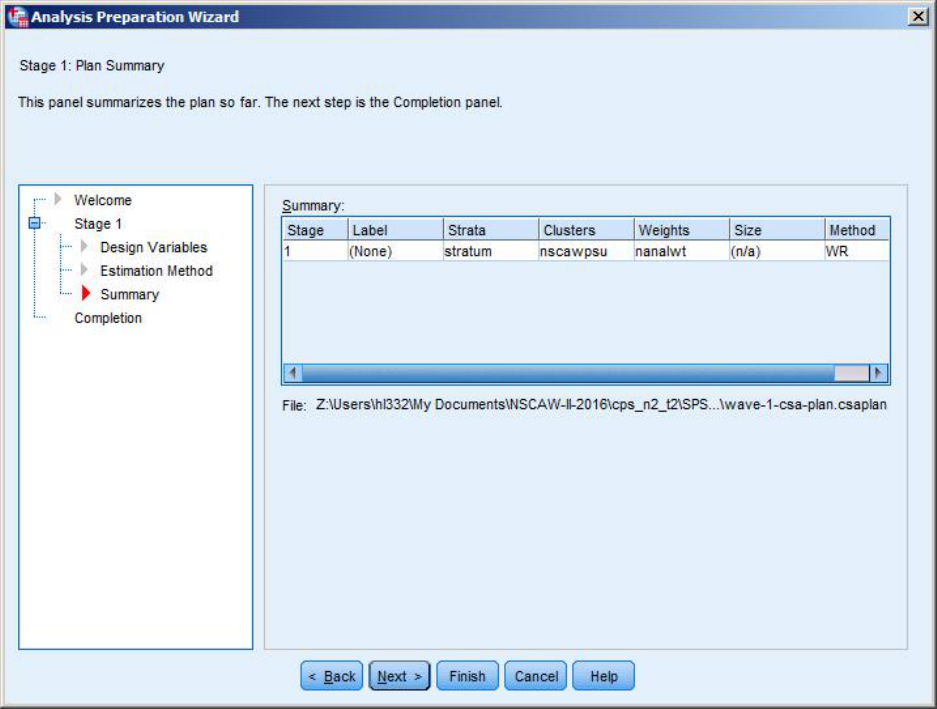
The next window to appear is the “Stage 1: Plan Summary information” (see Figure 6.). After reviewing
the plan summary information, click the “Next” button along the bottom of the window.
Figure 6. Screenshot of the “Stage 1: Plan Summary Information” window.
7

The next window to appear is called the “Completing the Analysis Wizard” (See Figure 7.) In that screen,
select “Save your specifications to a plan file” and click the “Finish” button along the bottom of the
window.
Figure 7. Screenshot of the “Completing the Analysis Wizard” window.
If you leave the radio button selection to the default “Save your specifications to a plan file” and click
the “Finish” button, your plan file will be saved to as a .csaplan in the file location you specified earlier in
the process. If you change the radio button to select the “Paste the syntax generated by the Wizard into
a syntax window” the syntax will be automatically generated and displayed in a syntax window. Proceed
to the next page to view the syntax generated by the Analysis Plan Wizard. The syntax can be modified
to create analysis plans for analyses involving other waves of data.
8

Below is an example of the syntax that would be displayed based on the example in this document
which is for a Wave 1 only analysis.
* Analysis Preparation Wizard.
CSPLAN ANALYSIS
/PLAN FILE= ‘C:\temp\wave-1-csa-plan-test.csaplan'
/PLANVARS ANALYSISWEIGHT=nanalwt
/SRSESTIMATOR TYPE=WOR
/PRINT PLAN
/DESIGN STRATA=stratum CLUSTER=nscawpsu
/ESTIMATOR TYPE=WR.
You are now ready to run your complex samples analysis that is appropriate for your newly created CSA
plan.
If you have questions please send them to NDACANsupport@cornell.edu.
9
